Creating Depth and Dimensionality in Landscape Photography
by Thibaut Pawlas
One of the great challenges in landscape photography is to revive a sensorial and immersive three-dimensional experience of being in nature within a two-dimensional photograph that truly does justice to the beauty witnessed in person. It is certainly not an easy task, but if we want to overcome this challenge, a solid understanding of the concepts of depth and transitions is required. In this blog post, we'll explore the idea of creating depth and dimensionality in landscape photography, with a particular focus on the use of transitions as a visual tool. We will briefly consider in the first part what can be done in the field before moving on to the core idea of transitions and how the post-processing stage can help us to infuse depth and dimensionality in our photographs.
Capturing Depth in the Field
Depth and dimensionality in a photograph can make the viewer feel as though they are physically present in the scene. It allows the eye to explore the image, moving from the foreground to the background, often discovering intricate details along the way.
Composition and Framing
To recreate a sense of depth in a photograph, it's essential to carefully frame the scene. One common technique is to include foreground elements that draw the viewer's eye into the image. By positioning objects like rocks, flowers, or branches in the foreground, you can establish a sense of scale and distance, effectively creating layers within the frame.
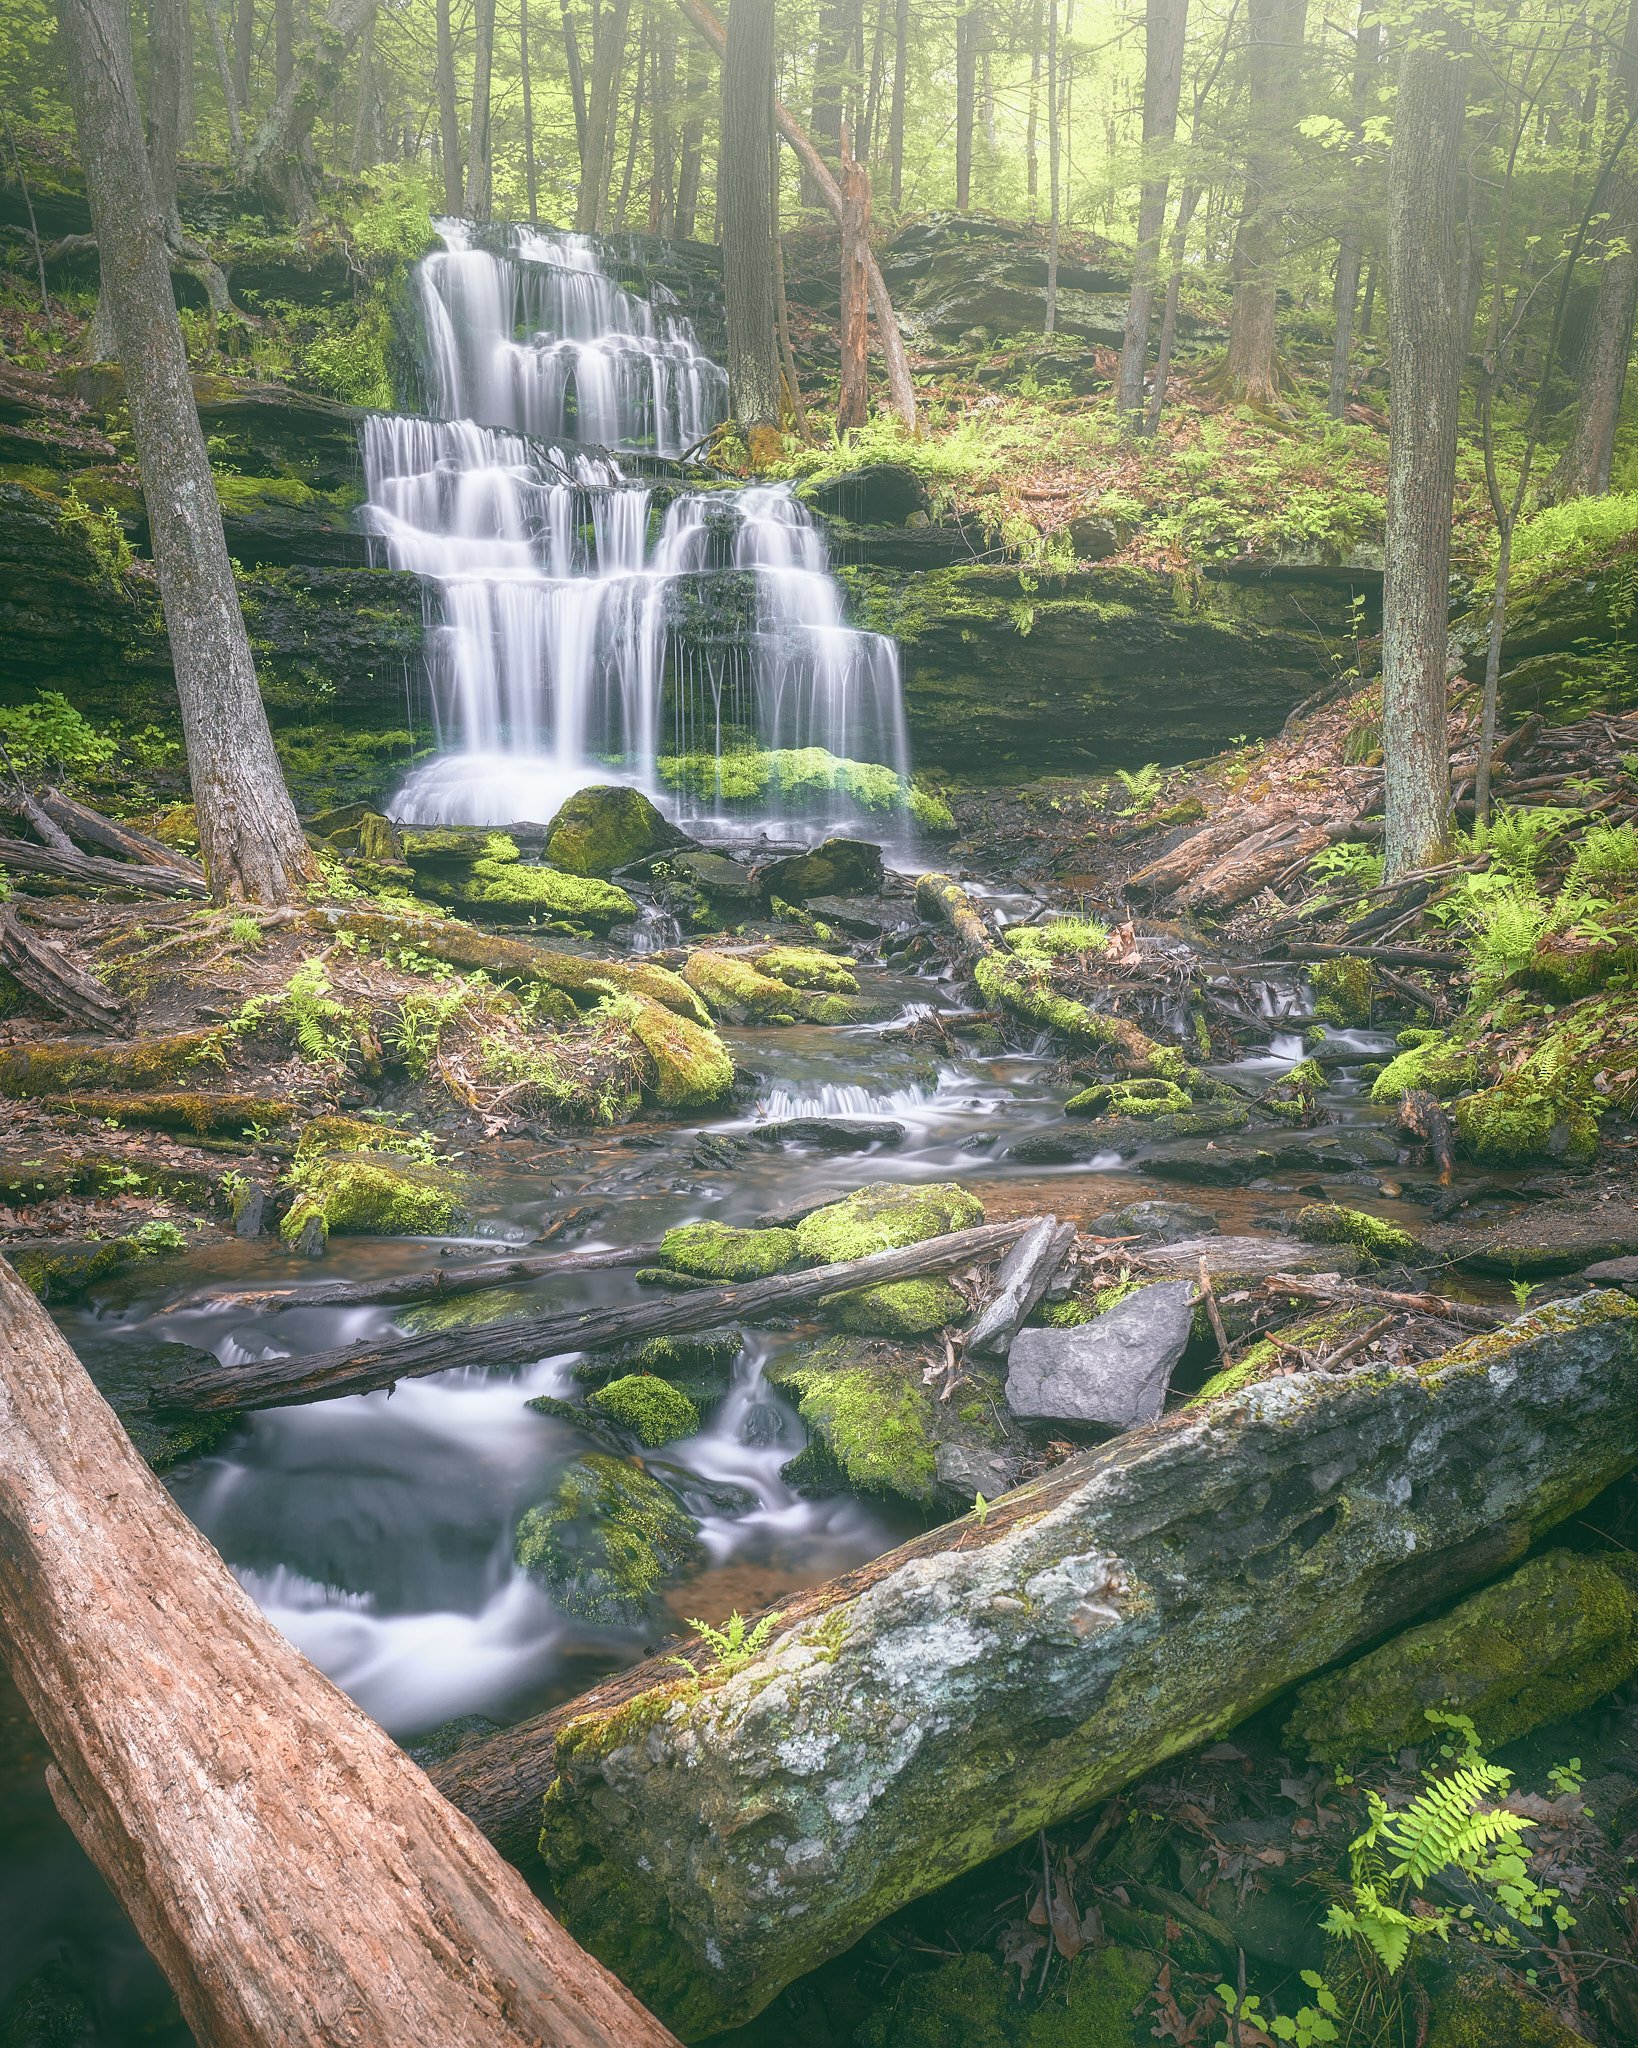
Trunk, rock, and fern positioned in the foreground to draw the viewer's eye into the image. © Thibaut Pawlas
Leading Lines
Leading lines are another valuable tool for adding depth to our images. These are natural or man-made lines within the landscape that guide the viewers through the photograph. Paths, rivers, fences, or even the shapes of clouds can serve as leading lines, drawing the eye into the scene and giving a sense of perspective.

Sand pattern and s curve used as leading lines. © Thibaut Pawlas
Light and Shadow
Light plays a crucial role in enhancing dimensionality in landscape photography. Using the interplay of light and shadow will create contrast and emphasize contours and shapes in the landscape. During the golden hours of sunrise and sunset, for example, the warm, angled light can accentuate texture and depth, casting long shadows that reveal the terrain's relief.

Directional light before sunset in the Queyras (Southern French Alps) used to emphasize form and depth. © Thibaut Pawlas
Transitions and Post-Processing
When you look at a landscape, whether it's a mountain range, a lakeside scene, or a lush forest, your eyes naturally perceive depth. The ability to preserve and create this depth in a photograph will improve your images and is done through enhancing transitions at the post-processing stage. These gradual shifts between elements in the frame will also help viewers navigate the scene and appreciate its three-dimensional qualities.
Even if we have done everything “right” in the field, when we import raw files in our editing softwares they usually appear flat and can look very disappointing compared to what we have experienced with our own eyes. Let’s have a look at how we can bring back life to these raw files and do justice to the beauty witnessed in person.

Golden larches and snow in the Southern French Alps (Ecrins National Park) © Thibaut Pawlas
Atmospheric Perspective & Tones
Atmospheric perspective is a phenomenon where the atmosphere itself influences the perception of depth. It causes distant objects to appear lighter, less saturated, and slightly blurred. The natural haze or mist thus creates a gradual transition that adds depth to your image.
Saturated colors in the foreground become less saturated as the distance increases. Ceillac, France. © Thibaut Pawlas
If we want to preserve this atmospheric perspective, I advocate for staying away from heavy global adjustments as much as possible, especially when it comes to contrast, clarity, and dehaze, as well as highlight and shadow recovery sliders. Heavy global adjustments will ultimately result in a blend of the different elements and layers of our photographs and is precisely what we need to avoid if we want to enhance atmospheric perspective.

A selective approach is required to preserve and enhance the atmospheric perspective. The idea is to recreate in our edit what we naturally see with our eyes and this implies processing foreground elements differently from background elements. The foreground area typically benefits from more contrast, clarity and structure while the background, on the contrary, needs less contrast and negative dehaze can be used.
In this example, using color readouts on shadow areas, we can see that the brightness level is increasing as we move through the frame. In other words, the shadows are very dark in the foreground (4) and they get lighter and lighter as the distance increases (132 in the background).
It is worth noting that other atmospheric elements, such as fog, mist, or haze can introduce transitions that add a sense of depth and mood to your images. The gradual disappearance of distant objects due to atmospheric conditions can also create a sense of mystery.

Hoodoos in the fog near Embrun in the French Alps © Thibaut Pawlas
Atmospheric Perspective & Color
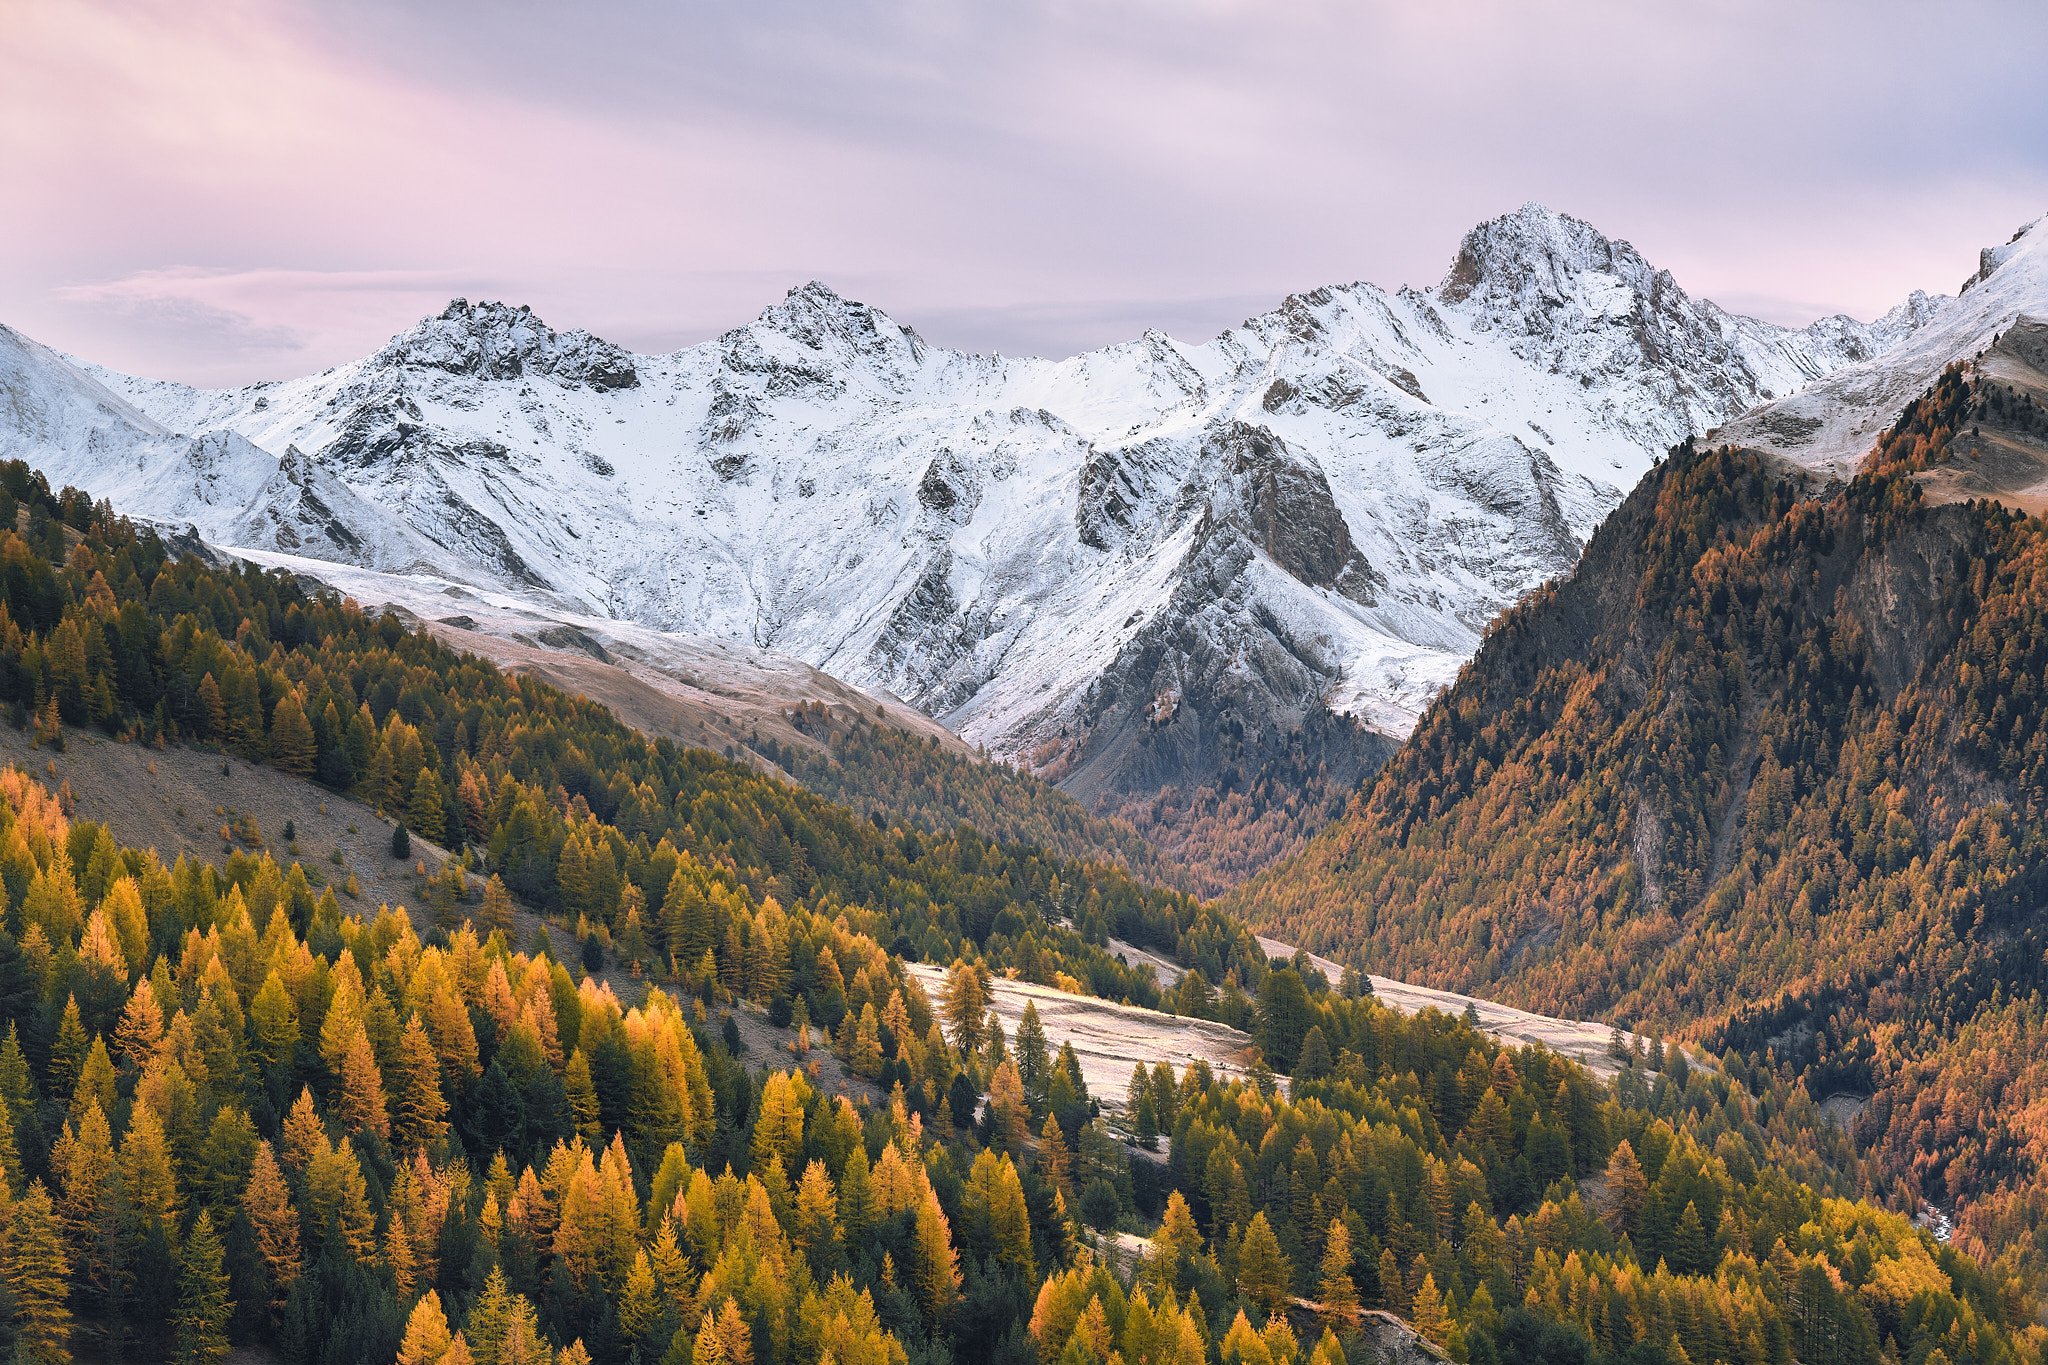
Another consequence of the atmospheric perspective is that colors shift toward cooler tones and become less saturated as objects recede into the distance. Warm colors, such as reds and yellows, tend to appear more prominent and closer to the viewer, while cool colors, like blues and greens, have the effect of receding into the background. We should use this to our advantage when we compose and process an image.

Using warm fall and cool winter colors to create separation and depth. © Thibaut Pawlas
It is worth paying attention to how different colors interact and complement each other. From the warm hues of a sunset transitioning to the cooler blues of the sky, or the contrast between a colorful foreground and a muted background, color transitions can be really useful to enhance a sense of depth in your photographs.
I would like to conclude this section by looking at the work of landscape painter Albert Bierstadt (1830-1902). Not only is there something to learn from his composition, but the principles discussed above were applied methodically.
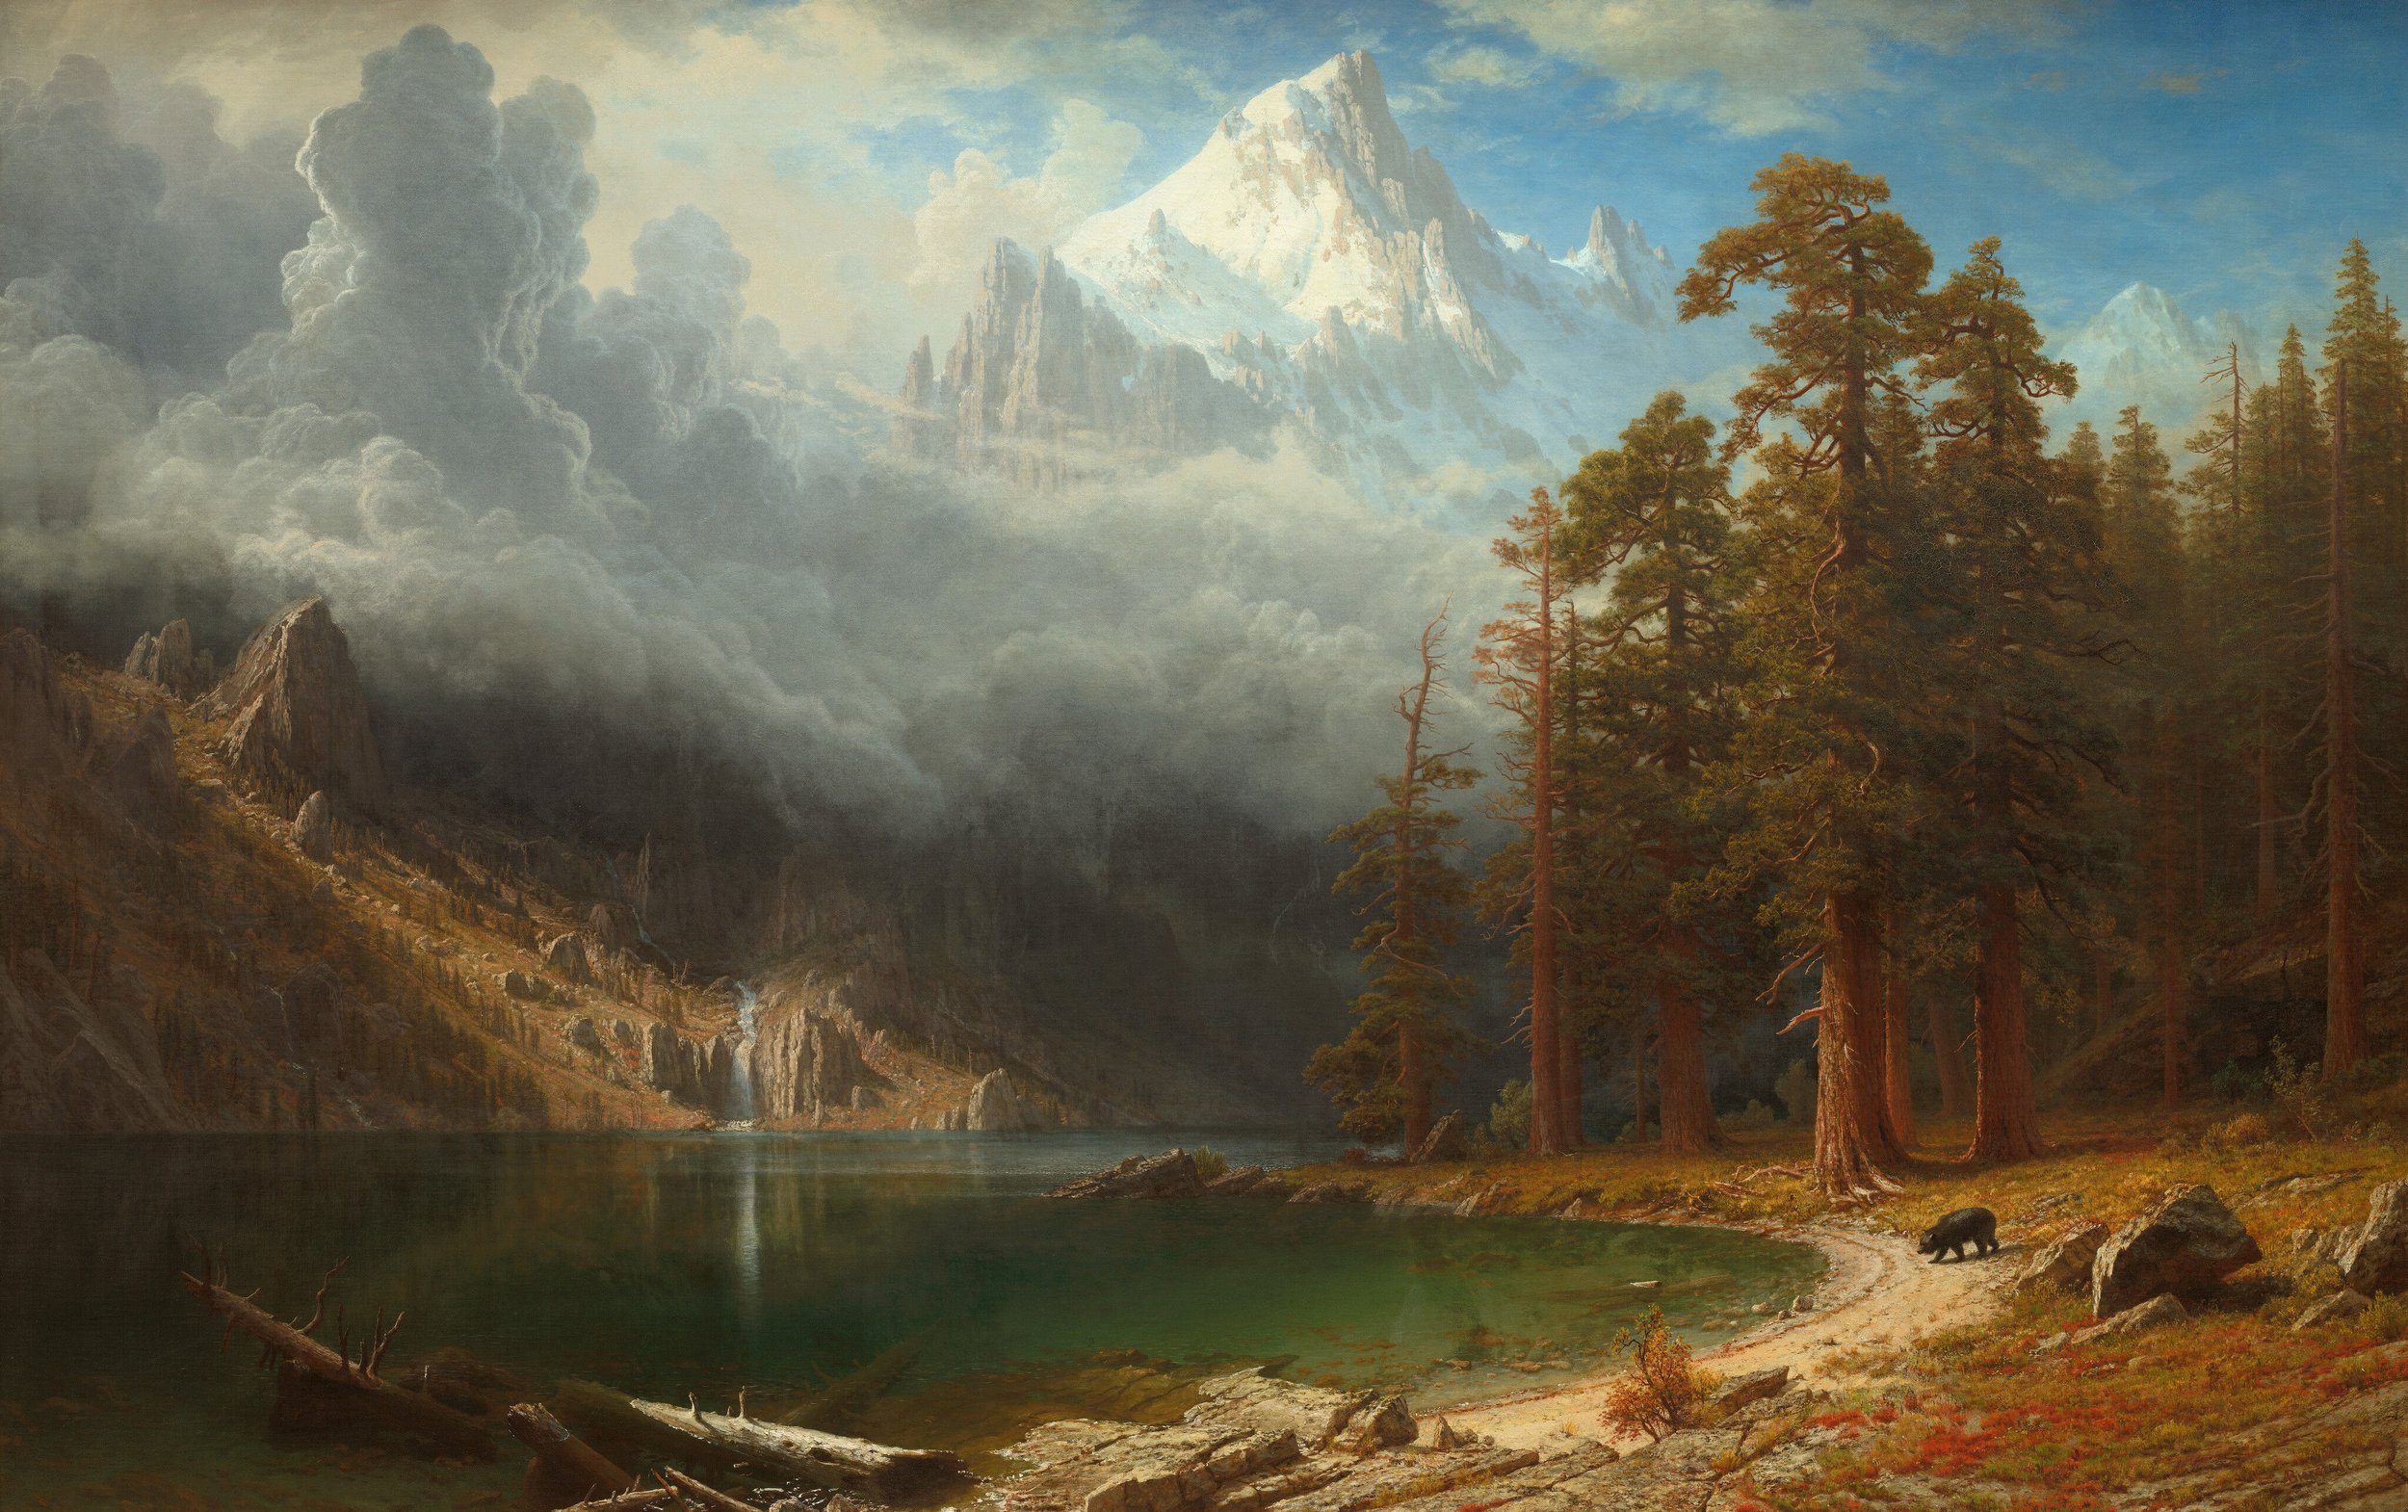
Albert Bierstadt Mount Corcoran 1876-1877
In this spectacular painting, to create the illusion of depth, Albert Bierstadt used the following techniques:
Directional light, creating contrast and enhancing forms
Complementary color harmony (warm in the foreground and cool in the background)
Atmospheric perspective (darker shadows in the foreground and lighter shadows in the background)
As photographers, I believe that we can learn a lot from other art forms, especially from painters who have worked and mastered the concepts of composition, light, and color for centuries.
Creating depth and dimensionality in landscape photography is a multi-faceted process that combines the elements of art and science. To capture the essence of the natural world and do justice to the beauty witnessed with our own eyes, we must understand the concepts of depth and transitions. I hope that this blog post will get you started on your journey to exploring transitions in landscape photography. It is important to experiment and fail (a lot!) in order to create images that are meaningful to you. My goal was to give you the foundation of the concepts of depth and transitions; it is now up to you to build on these and bring your own perspective and creativity in the process.

Seasonal transition in the Southern French Alps © Thibaut Pawlas