Shooting the Full Moon

By David Long
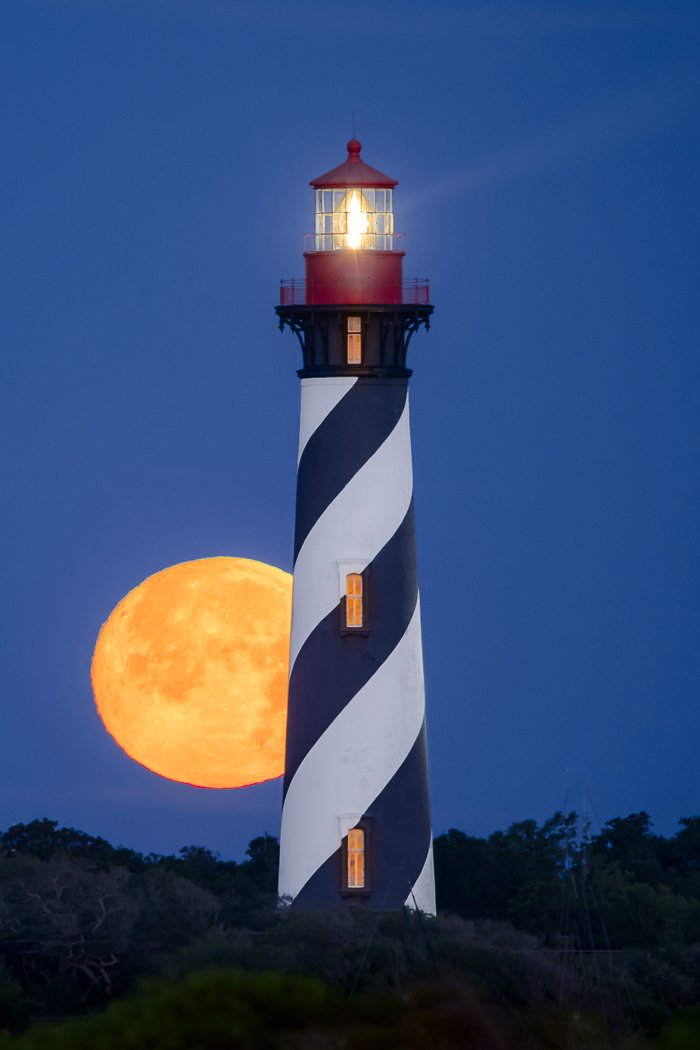
Nothing stops a photographer more than a full moon rising, especially if you can catch it near the horizon with an interesting foreground. While the moon is always the same size in the sky, it looks unusually large and has its deepest color when you photograph it at its lowest point. Many photographers struggle to get a good full moon image. There are many different techniques for shooting the full moon so this blog is intended to give you my methods for shooting as well as other information that is critical to coming away with not only a sharp and colorful moon, but also an interesting landscape image.

First and foremost, let’s get to the meat of it:
Equipment
You’ll want a long telephoto lens to create “larger than life” full moon images. A tripod is a must to eliminate camera shake and allow for bracketing. We recommend a sturdy one with no center pole to extend which can create shake. A cable release or 2 second timer is highly recommended to prevent camera shake, and it’s good practice to remove camera straps in case of wind.
Settings

The critical issue when shooting the moon is to not overexpose the moon and lose detail. The following are my starting settings. Be ready to adjust as you work with these guidelines.
ISO - Even though you will be photographing the moon at night, remember that it is a relatively bright object and will not require higher and noisier ISO settings. For moon-in-landscape photos, you may need to adjust your ISO to help maintain a certain aperture or shutter speed but you should never need to go beyond 800 unless you are shooting 45 minutes or more after sunset or before sunrise.
Aperture - Sharpness is the name of the game. Set your lens at its sweet-spot aperture (for most lenses this is f/8) and adjust shutter speed and ISO as needed.
Shutter speed - Short shutter speeds are used to freeze action. The moon orbits the Earth at a distance and it is moving. Shooting with a slow shutter speed will cause the moon to blur. A good rule of thumb is to keep your shutter speed as high as possible, with a 1/2 second being the absolute maximum to keep a sharp resolution
White Balance - With modern post-processing methods, I leave mine in auto and make any adjustments in post.
Metering & Bracketing - I use spot metering and take the reading right off the moon as soon as it is visible on moonrise or when it gets close to my intended composition on moonset.
I bracket shots at -1, -2-1/3, +1/3
I check my first set of shots for exposure and shutter speed
I have my highlight alert (blinkies) on
I use my magnifier to check the edge sharpness of the moon
Shoot a lot of shots as you will find that some photos are sharper than others taken due to atmospheric interference and other factors like clouds and aircraft
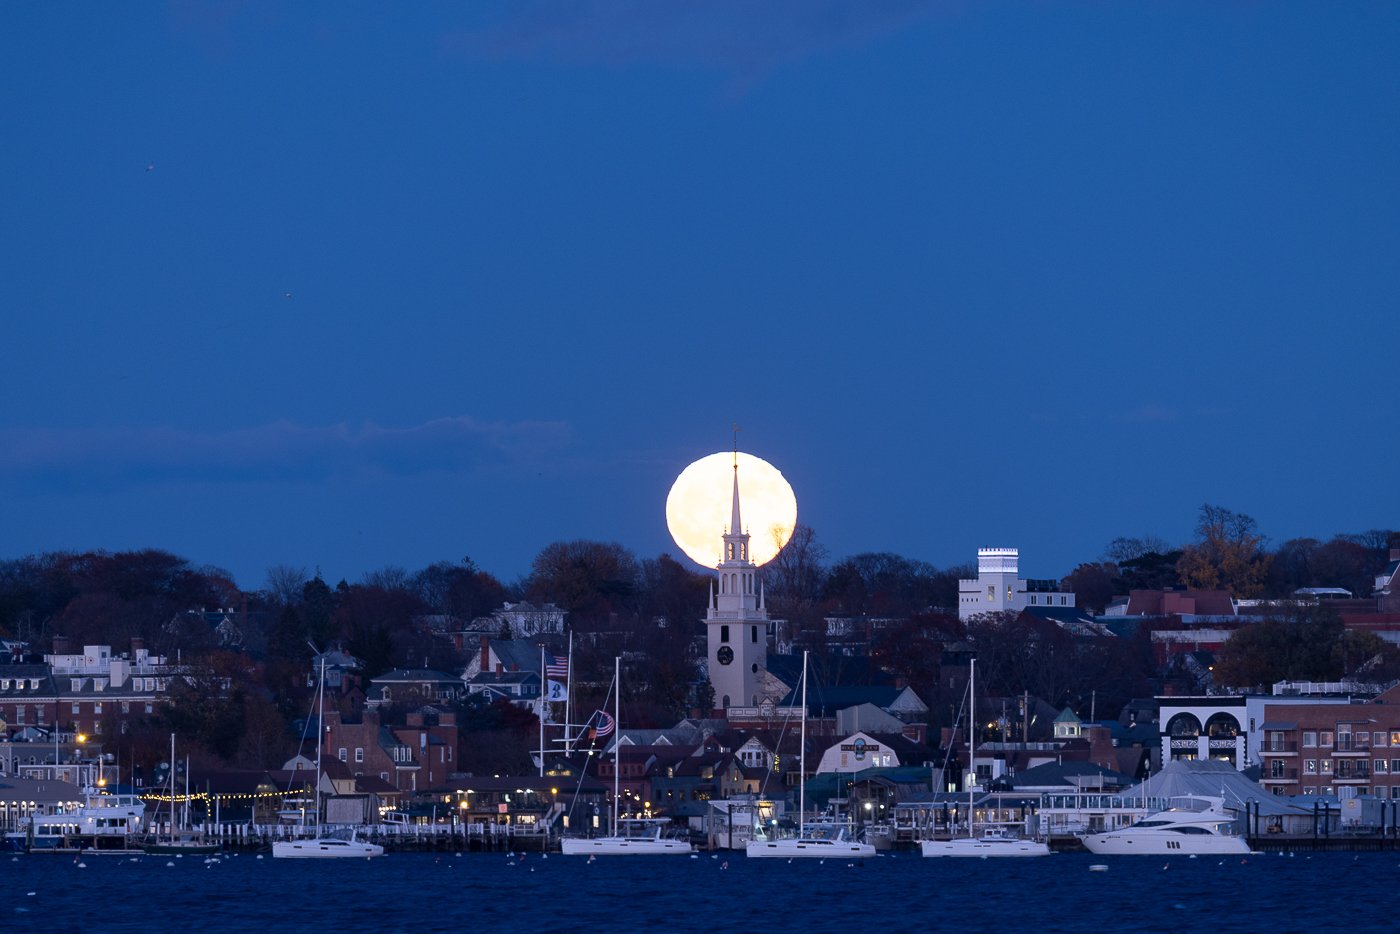
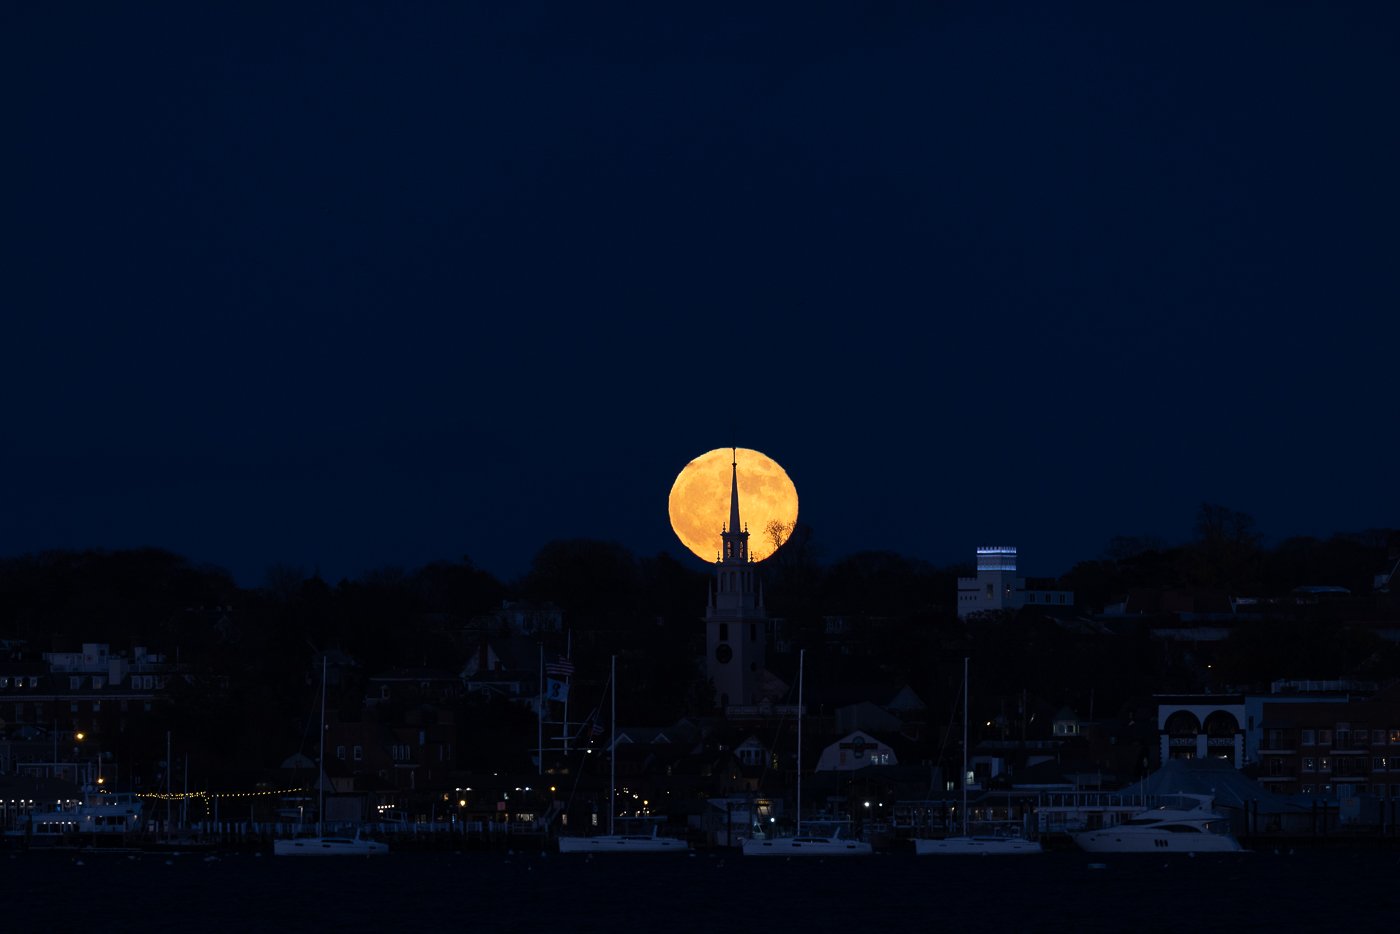

The result of Bracketing (above)
Distance to the Subject

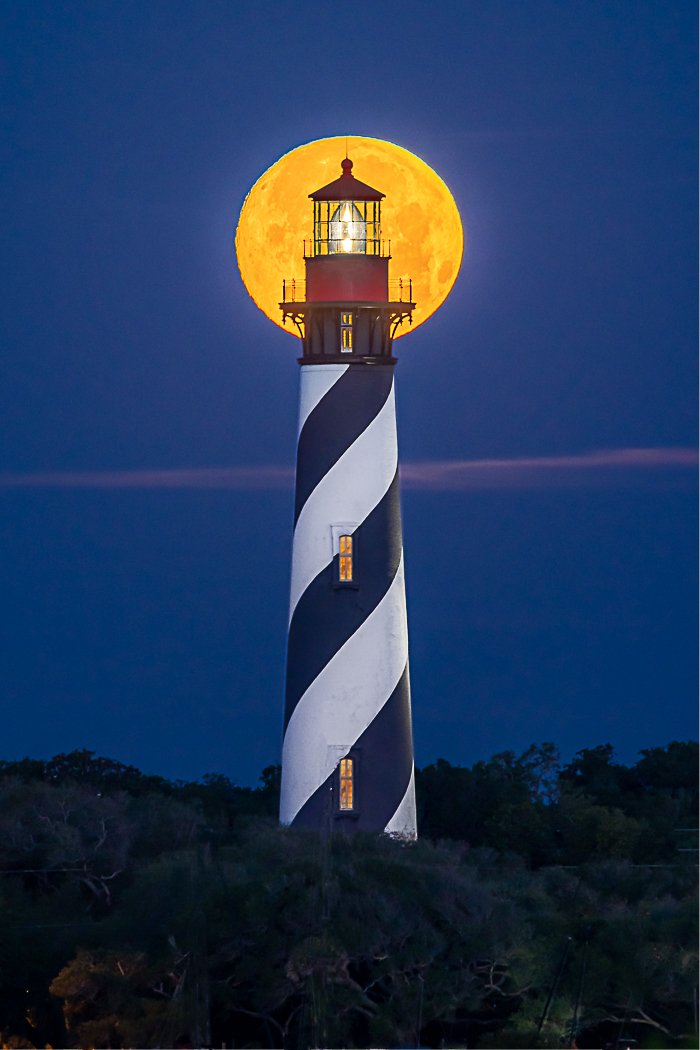
If you want to make the moon look very large, shoot it behind a subject far away (3/4 - 1.5 miles is my preference) and use your longest lens (300-500mm). Crop the picture afterwards. Some go out 10-20 miles and have a super exaggerated moon, but you will battle a lot of atmospheric issues.
If you are looking to have the moon look more normal, have the foreground object closer and shoot it with a shorter focal length lens (150-200). In images shot with the subject close up and under 100mm, the moon will look abnormally small.
Moonrise or Moonset?
Many people forget that the moonset is an opportunity to get full moon shots looking west instead of east. This can be very handy when there is no moonrise option. An added benefit of a moonset is the ability to track the moon’s movement for a longer period of time as it is descending versus the moonrise which can pop over the horizon too quickly.
Timing
When to shoot the full moon is a personal preference. I recommend between 15-30 minutes after sunset or before sunrise for a nice blue hour sky with some ambient light on the foreground subject. Anything earlier tends to give you a washed out moon and shots that are 45 minutes outside the window have too dark of a sky and are hard to process the foreground subject due to noise and lack of light.
Composing
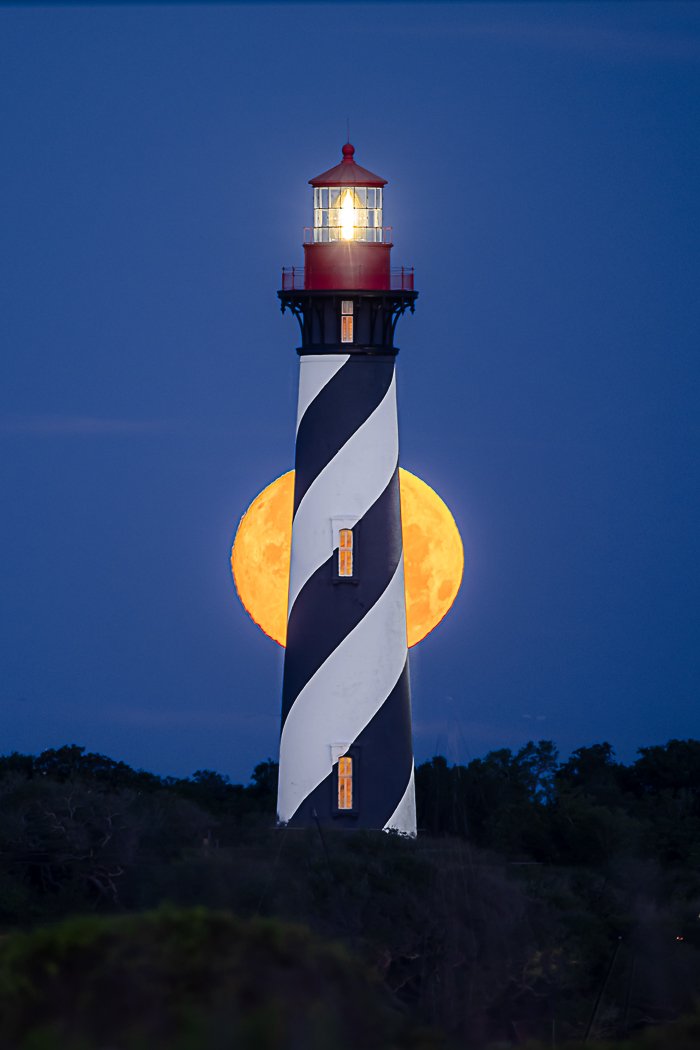
The moon is always the same size, but looks larger when positioned next to an object. Try and compose your shot with a strong foreground element at maximum focal length. Try many different compositions as you are likely to like one better than what you had planned. The moon moves so be prepared to move to get the exact alignment and composition that you want!
Moon Shoot Planning & Movement
We use The Photographer’s Ephemeris, Photo Pills or Sun Surveyor to plan moon shooting. There are many great YouTube videos on how to use these apps. For Photo Pills: Brenda Petrillo’s Photo Pills Friday. For Sun Surveyor, check out our very own video on planning a Full Moon Shoot.
The moon changes it position every month ranging from the southern sky in the summer to the northern sky in the winter so keep checking these apps for specific coordinates. The moon moves left to right as it rises and sets.
Conditions & Clouds

For regular astrophotography, I definitely try to avoid any type of cloud cover, but for a full moon landscape, bring it on! As with sunset/sunrise photography some clouds can make or break the photo. If you are driving to a location, check out a satellite image for cloud cover.
For seasons - Winter is the perfect time to photograph full moon landscapes. The cold air can be much clearer than the humidity laden summer nights. A coating of snow will help reflect a lot of that moonlight and create a nice bright foreground, and Bonus: the full moon rises much earlier in the evening.

Types of Full Moons
Ⓒ Sciencenotes.org
Blood Moon - During a lunar eclipse, the Earth is passing between the Sun and the Moon, blocking the Sun’s rays. However, the Moon isn’t completely dark. What we see from Earth is the Moon slowly darkening and changing color over a few hours to an orange-red.
Supermoon - A supermoon is a full moon that occurs when the moon is near perigee (the point in the moon’s orbit where it is closest to Earth). The size of a supermoon is generally defined as 20% larger than normal. By this definition, there can be several supermoons in a year.
There are actually nicknames for all the full moons throughout the year! Get out there and catch ‘em all!
January - Wolf Moon
February - Snow Moon
March - Worm Moon
April - Pink Moon
May - Flower Moon
June - Strawberry Moon
July - Buck Moon
August - Sturgeon Moon
September - Harvest Moon
October - Hunters Moon
November - Beaver Moon
December - Cold Moon

David teaches a handful of workshops with us every year, and travels all over New England and the US to make his striking images. His workshops continue to be some of our most popular offerings, so make sure you sign up early if you would to attend! He also has released many e-books that guide you on your own trips in New England, which you can find here. Make sure to follow him on Instagram, where he’s always posting his new work, or visit his website.